Making an 18thc jacket
So...I love my cranberry wool gown, but I've been wearing it for upwards of three years as my only cool-weather 18thc, and I have become a Little Bit Tired of it. I only had a week to make something after Halloween at the Met, but I thought I could make a simple wool jacket in that time.
(Spoilers: I could!)
 And since occasionally fellow costumers ask how I make things, I thought I'd make this into a "This is how I sew" project. Usually I'm pretty bad about documenting the sewing process.
(And if that's boring to you, you may skip to the end and the event pictures!)
Don't consider this a tutorial - if that's what you're looking for, there are costumers who are far better at writing those than I! It's just that everyone costumes differently, and this is my method, which occasionally people do ask me to explain.
Which is hard to do, other than "I make it up as I go along. No, really."
Mid-late 18th century is the easiest for me, as I very seldom have to start from scratch any more - when I do, I drape on my form til I have some useable pieces, which I then make into a proper mockup and can fit from there. In this instance, I wanted a plain 1760-75ish jacket. Very "ish"...it's a mashup of a Janet Arnold jacket, a Costume In Detail dress, and what I know of the overall silhouette of the time period.
Materials consisted of scraps from my wool 1815 dress from last year, and a bit of natural linen. I sewed the topstitched seams with matching silk thread, and the inner seams with white cotton. Usually I don't bother switching off, but there was so little thread left on the silk spool I was afraid I'd run out!
After digging through the patterns I've made, I figured the lining of my cranberry wool gown would be the best base to use. I could use the same pieces with very little tweaking for a four-piece jacket.
I laid out the pattern pieces on my mockup fabric (yes, it's a sheet), and very roughly drew around them for my mockup. The back piece stayed the same; I extended the center fronts to have more of an angle so they would meet at the front point. I also made the shoulder strap and fronts into one piece; they're separate on the cranberry wool.
 Yes, I make grain line markings on my own patterns and then ignore them...
Pinned the mockup together - I almost never sew mockups. I don't recommend that...but I'm lazy.
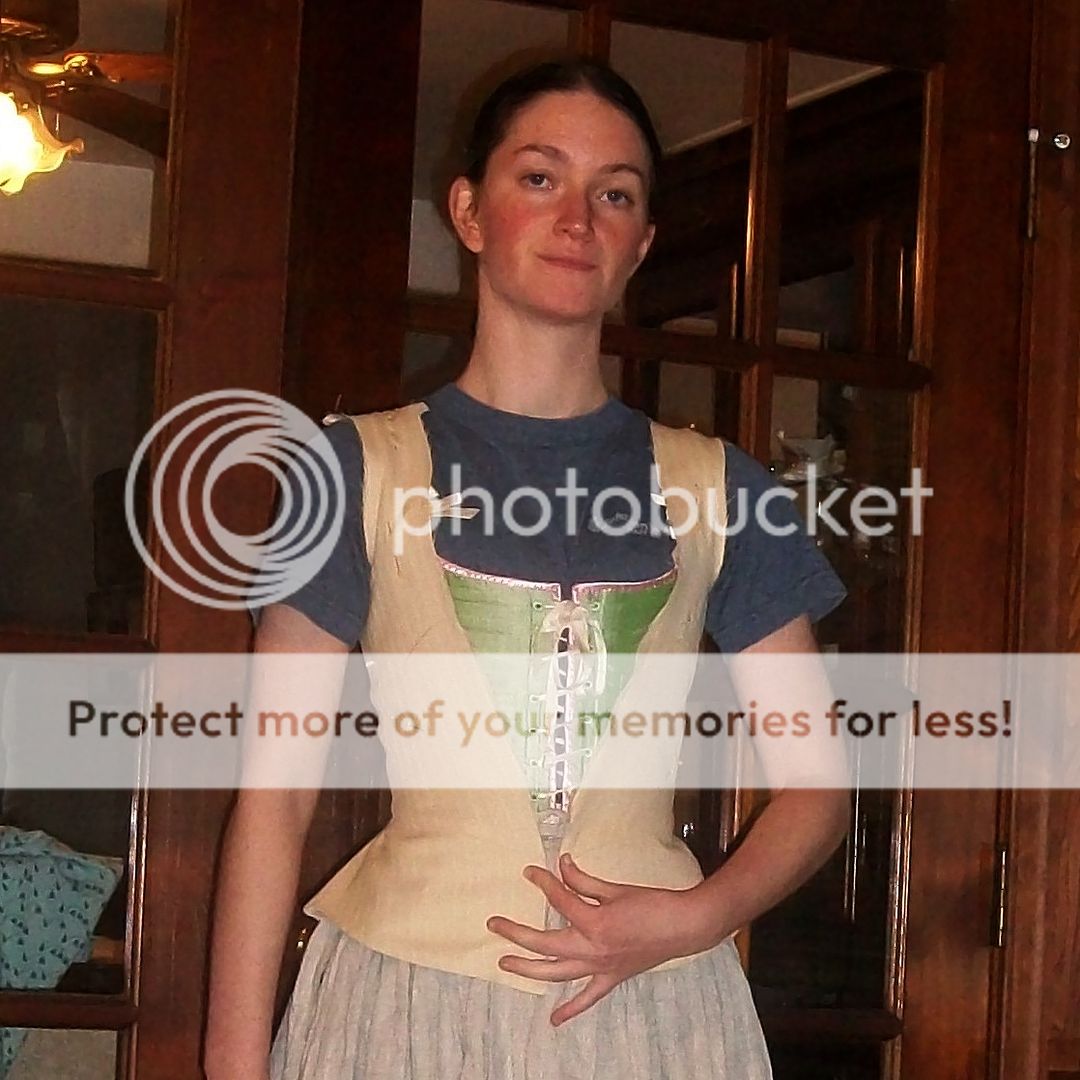
 Fronts were obviously too big, but it's easier to tweak too big than too small! Too small, and you have to cut out another mockup. And that's just annoying.
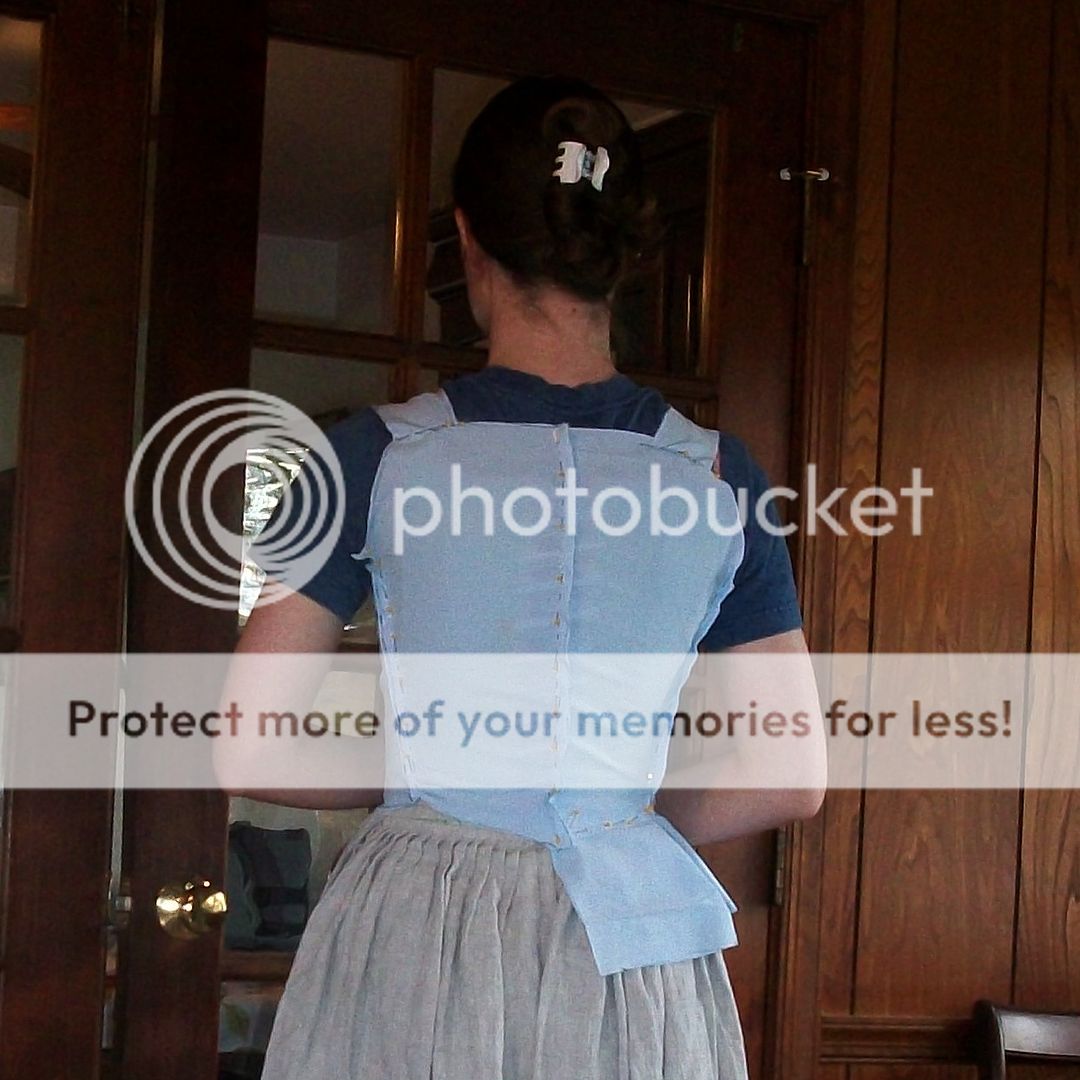
 Back was pretty good. A little big at the waist, which was an easy fix. I ended up taking most of the extra width out of the side seam rather than the front pieces (though the front edges got probably a quarter-inch trim), so as to get a slightly more pronounced curve at that side seam. Mostly because I just thought it would look nicer that way.
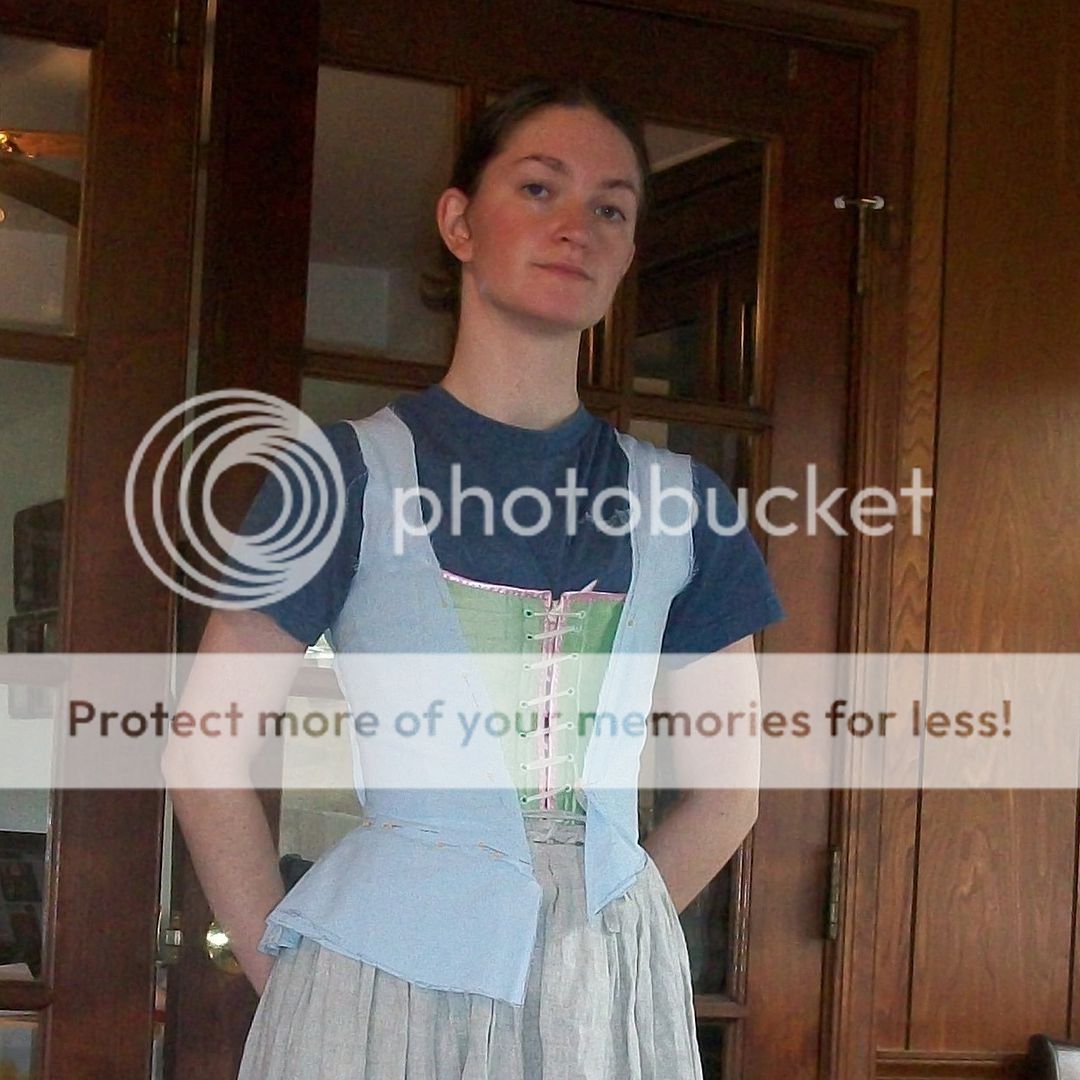
 Fitted! The left side, anyway (my right)...which is another case of do as I say, not as I do. With 18th things I generally only bother to fit one side (unless it's a completely new pattern). I'm uneven but not enough to wreak havoc on my patterning.
 The shoulder strap is a little loose, but as the shoulder straps always get tweaked in the real garment, there's no sense in trying to fit them exactly in the mockup.
On to the jacket skirts! (Ick.)
I had success with simply cutting out rectangles of muslin, and cutting/pleating them into jacket skirts on the Mary Heany jacket, so that's what I did here.
 Surprisingly it wasn't too bad, especially when you consider that is literally two rectangles pinned together and pleated up at the seam to fit.
 Next I drew approximately where I wanted the hem to be. If you're using a Sharpie I do not recommend doing this over your nice silk petticoats, as you may end up drawing on them. Not that I, uh, have ever done this. There is definitely not a little black dot on the back of that petticoat. Nope.
 Note to self: do not cut hem as wonkily as it's drawn...
 Trimmed the skirts up, and happily didn't trim them too much (because, again, that would mean a new mockup piece, and, hello lazy). There was still a bit of futzing to be done with small wrinkles where the bodice and skirts join, but it just required pulling out a bit of length from the bodice edge, and it was much better.
 The stomacher is another piece I don't bother to fit until I've made the real garment; why bother? The edges might end up changing, and it would be very annoying to sew a stomacher only to discover it's too small!
I didn't photograph mocking up the sleeves (nobody likes sleeves) because they're taken almost exactly from the cranberry wool gown's sleeve pattern. I just made them about a half-inch longer, cut out a mockup to check that that worked (it did, just had to move the sleeve dart a wee bit), and called it Good Enough.
 And then I cut out all the pieces! Which took longer than I wanted it to, because I was making sure the stripes didn't run all wackadoodle. Dumb, because you can hardly see them, but...still. Symmetry is big in this era...
 I had just a leetle bit of fun with stripes on the skirt back pieces, with the stripes running on the bias.
 This was Wednesday's work; all the really basic construction of the pieces finished.
 I'm not going to go over sewing technique in detail (that can be found in lots of great blogs or Costume Close-Up), but this is basically it. The seam's topstitched through three layers, then the lining's folded over and whipped down to hide the raw edges.
 And the outer fabric and lining are sewn separately for the last inch or so, in order to be able to turn the raw edges in towards each other and stitch them together for a finished edge.
 Ironed under the edge of the wool layer, to make it easier to deal with while sewing skirts on.
 The skirting's stitched on to the wool layer; now to fold that linen edge under and tack it down.
 And in the interests of full disclosure, this is how well my pleats lined up. Not well. Also not a big deal. Not much I make ends up matching perfectly, because it doesn't have to. Trim it down, tuck it in, make it work.


 Time to try it on and adjust the shoulder straps!
 Once those were stitched down, I sewed the lower half (aka armpit side) of the sleeves on, and pinned the top half so I could try them on and see if I liked the pleating. I didn't at first; that took some fiddling. 18thc sleeves are much quicker to fit with two people, but you can easily do it on your own. Just have to keep taking it off, repinning, putting it back on, and seeing if that works!
 Those pleats were too high; they gave me weird pointy shoulders. Since I ended up with more extra fabric than anticipated in these sleeve heads (but hooray for unanticipated mobility?), I ended up with two pleats to avoid the weird pointy shoulder look.
 And yes, I almost always fit sleeve heads without my stays, unless I was already in them. I haven't found it makes enough of a difference to actually put them on. Again, not something I really recommend, but...
 After I finished sewing the tops of the sleeves and stitching the lining, I hemmed the CF/neck edge (happily without incident). Then it was time for the stomacher! Basically I took a big old piece of muslin, pinned it to my stays, put the jacket on, and drew where the edges ended.

 And I always draw in more space than I think I'll need...nothing like discovering you've made your stomacher just slightly too small!
Then I cut it out of linen and wool (I haven't put boning in a stomacher yet...it seems like work), and hemmed them like usual. This time I made tabs to pin the stomacher in, because my red wool gown doesn't have tabs on the stomacher, and it's very annoying to pin in. Good thing the tabs were worth the work, because they were also annoying to do! Just scraps of linen hemmed into little rectangles and sewn in, but still.

 And with a mostly-even stomacher, it's all finished! I admit I was sewing the tabs on the stomacher on Saturday night, but not late.
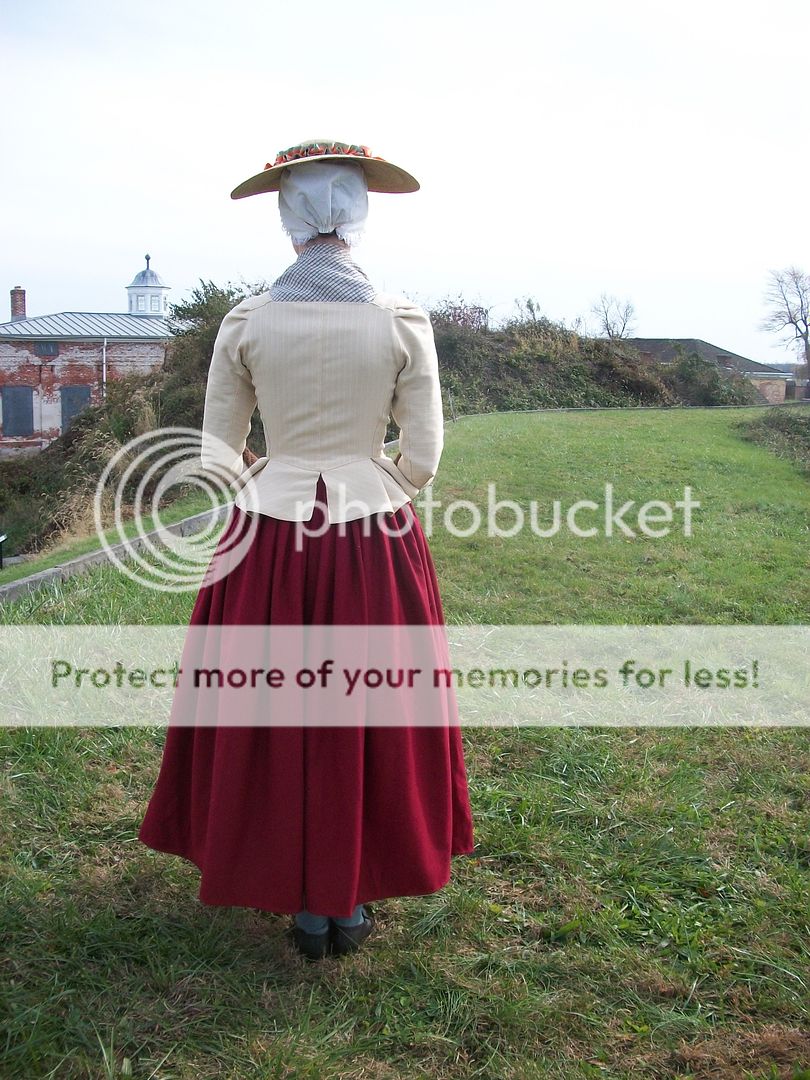
 And some finished pictures from Siege Day at Fort Mifflin yesterday. It was a fun little event, if a little chilly down there on the river! It was misleadingly not chilly at my house, so I didn't bring my cloak. Ooops.


(Spoilers: I could!)
(And if that's boring to you, you may skip to the end and the event pictures!)
Don't consider this a tutorial - if that's what you're looking for, there are costumers who are far better at writing those than I! It's just that everyone costumes differently, and this is my method, which occasionally people do ask me to explain.
Which is hard to do, other than "I make it up as I go along. No, really."
Mid-late 18th century is the easiest for me, as I very seldom have to start from scratch any more - when I do, I drape on my form til I have some useable pieces, which I then make into a proper mockup and can fit from there. In this instance, I wanted a plain 1760-75ish jacket. Very "ish"...it's a mashup of a Janet Arnold jacket, a Costume In Detail dress, and what I know of the overall silhouette of the time period.
Materials consisted of scraps from my wool 1815 dress from last year, and a bit of natural linen. I sewed the topstitched seams with matching silk thread, and the inner seams with white cotton. Usually I don't bother switching off, but there was so little thread left on the silk spool I was afraid I'd run out!
After digging through the patterns I've made, I figured the lining of my cranberry wool gown would be the best base to use. I could use the same pieces with very little tweaking for a four-piece jacket.
I laid out the pattern pieces on my mockup fabric (yes, it's a sheet), and very roughly drew around them for my mockup. The back piece stayed the same; I extended the center fronts to have more of an angle so they would meet at the front point. I also made the shoulder strap and fronts into one piece; they're separate on the cranberry wool.
Pinned the mockup together - I almost never sew mockups. I don't recommend that...but I'm lazy.
On to the jacket skirts! (Ick.)
I had success with simply cutting out rectangles of muslin, and cutting/pleating them into jacket skirts on the Mary Heany jacket, so that's what I did here.
 |
| One slightly-wonky rectangle for each piece. |
 |
| Pleated and pinned together. Now the fun part...does it look completely ridiculous on? |
I didn't photograph mocking up the sleeves (nobody likes sleeves) because they're taken almost exactly from the cranberry wool gown's sleeve pattern. I just made them about a half-inch longer, cut out a mockup to check that that worked (it did, just had to move the sleeve dart a wee bit), and called it Good Enough.
Then I cut it out of linen and wool (I haven't put boning in a stomacher yet...it seems like work), and hemmed them like usual. This time I made tabs to pin the stomacher in, because my red wool gown doesn't have tabs on the stomacher, and it's very annoying to pin in. Good thing the tabs were worth the work, because they were also annoying to do! Just scraps of linen hemmed into little rectangles and sewn in, but still.
 |
| The group of us...minus the one behind the camera. |
 |
| I'm always running up hills and down hills...haven't fallen on my face yet but there's still time. |
 |
| I'm probably watching a plane land...the Philadelphia airport is literally RIGHT NEXT to the fort. |
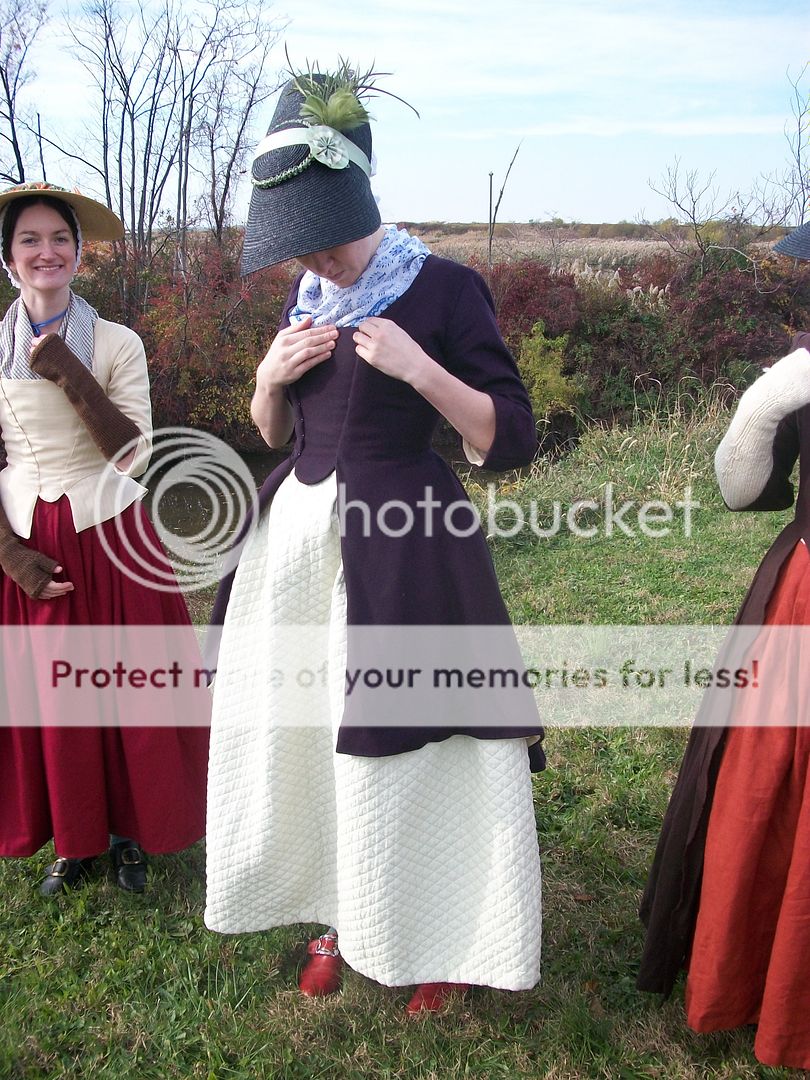 |
| 99 problems but a fichu ain't one? |
 |
| The British won this one, despite the Continentals' vastly superior numbers. Sorry, guys. Almost like it's a predetermined outcome... |
I love this jacket!
ReplyDeleteAnd I have to laugh at your techniques--they're so close to mine. I don't sew muslins or wear stays to fit sleeves, make guesses as to what'll work, and can't stand cutting out another muslin :)
Thank you!
DeleteHah! That's so funny - but hey, if *you* sew this way, I must not be completely out in left field! :D
Gosh, I know it's not wise, but I hate mock-ups too. I know it's helpful and makes the final garment fit better, but just... duh. Who would want to sew the same thing twice, haha! I really like your jacket by the way. Thanks for showing the step by step construction. I'll be attempting a similar jacket soon so it's very useful!
ReplyDeleteMockups are just terrible things! Sure, you want to get close, but a mockup is never going to behave exactly like your dress fabrics...unless you're using your dress fabrics to mock up...in which case what would be the point? ;)
DeleteAnd thank you! I'm glad it's useful to someone besides me (aka when I go back and wonder how the heck I put that thing together?)!
Oh your jacket is fabulous! And looks so perfect with the skirt/petticoat (?) When, in the future, I attempt this era, I will be coming back to this post!
ReplyDeleteBlessings!
Gina
Thank you so much! Yep, it's a lovely warm woolen petticoat that comes in very handy for those cold days. (Also water-resistant, another excellent quality of wool, haha.) And I'm always thrilled to be helpful to other costumers, so thank you for that, too! :)
Delete